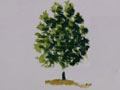
How To Paint A Tree Using Watercolor - A Beginner Lesson.
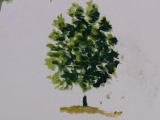
Here is a detailed instruction of how I paint a realistic tree. Although my style is not necessarily yours, it would be a good starting point.
The clusters of leaves that I talked about in the first part of this lesson, each get their own light. Some are mostly in full sun with only little shadowing below. Others are in full shade, and are painted with pretty much one color and one value. In between are leaf clusters with very interesting shadow patterns. I paint leaf shadows a very blue green rather than a darker green. Its a pretty advanced concept, but its covered in my lesson "Shadows In The Landscape".
Every tree has "sky holes". The are less likely to be in the middle where the tree is densest, but as we get to the edges there are those holes. The tree holes are more prominent in spring and fall, and less so in the summer, but a tree without holes is a lollipop.
A very important trick in painting a tree is connecting it to the ground. Just soften the edge of the base. That almost always is the touch you need. Finally, don't forget the shadow the tree casts on the ground. It too has "holes".
You want to take Part 1 before this one.
MATERIALS LIST
Hover Or Click
A Color For Information
Burnt Sienna
A sedimentary color; sediments quickly offering a mottled or shimmery look to the final (wash)
+ close +Viridian
A sedimentary color; sediments quickly offering a mottled or shimmery look to the final (wash)
+ close +Pthalocyanine Blue
A "warm" (greenish) blue.
A non sedimentary color settles out smoothly yielding a uniform finish (wash)
+ close +Pyrrol Red
A "warm" (orangish) red.
A non sedimentary color settles out smoothly yielding a uniform finish (wash)
+ close +Arylide Yellow FGL
A "warm" (orangish) yellow.
A non sedimentary color settles out smoothly yielding a uniform finish (wash)
There is not an industry standard name for this color. I am offering DaVincis Brand name.
+ close +Yellow Ocher
A sedimentary color.
sediments quickly offering a mottled or shimmery look to the final (wash)
+ close +Cerulean Blue
A sedimentary color.
Sediments quickly offering a mottled or shimmery look to the final (wash)
+ close +Ultramarine Blue
A cool (purplish) blue.
A non sedimentary color settles out smoothly, theoretically yielding a uniform final (wash).
Actually Ultramarine Blue "flocculates" (gathers in clumps) so we only get a fairly smooth (wash)
Sadly, it's the only purplish blue thats light-fast and available to artists.
+ close +Alizarin Crimson
( Quinacridone )
A cool (purplish) red.
A non sedimentary color settles out smoothly yielding a uniform finish (wash)
n fact, Alizarine Crimson (a very early man made pigment) lost favor when it was found non light-fast.
Today we replace it it with a better version of the same color called Quinacdridone Red.
Nevertheless, manufacturers still call it Alizerine Crimson.
+ close +A cool (greenish) yellow
A non sedimentary color settles out smoothly yielding a uniform finish (wash)
There is not an industry standard name for this color. I am offering the DaVincis Brand name.
+ close +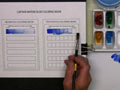 Coloring Book
First Watercolor Lesson, Washes And Values.
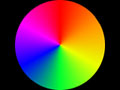 Color For Beginners - How to mix all the colors.
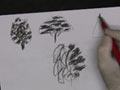 How To paint trees - The Fundamental Concepts.
 How To Paint A Tree Using Watercolor - A Beginner Lesson.
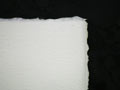 Preparing watercolor paper for wet in wet painting
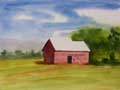 Painting A Barn - A beginner landscape lesson.
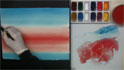 Watercolor Painting
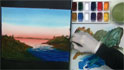
Sunrise / Sunset
(Dawn / Dusk)
Part 1 Painting The Sky.
 Watercolor Painting
Sunrise /:65px Sunset
(Dawn / Dusk)
Part 2 Painting The Islands.
 Watercolor Painting
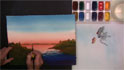
Sunrise / Sunset
(Dawn / Dusk)
Part 3 Painting The Lighthouse
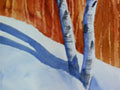 Birch Trees In The Snow. - A Watercolor Scraping Technique Lesson
Everything on this site is copyrighted,
Nothing may be copied or reproduced anywhere without written permission!